Enable Static Hosting, Configure CORS, and Set S3 Bucket Permissions
Enable Static Hosting, Configure CORS, and Grant Permissions for the S3 Bucket
After uploading your frontend source code to the S3 Bucket, you need to enable static website hosting, set up the index and error documents, configure CORS policy, and grant public read permissions so your website runs stably, is accessible from browsers, and can connect to the backend API.
Step 1: Enable Static Hosting and Configure CORS
-
Enable static website hosting for the bucket
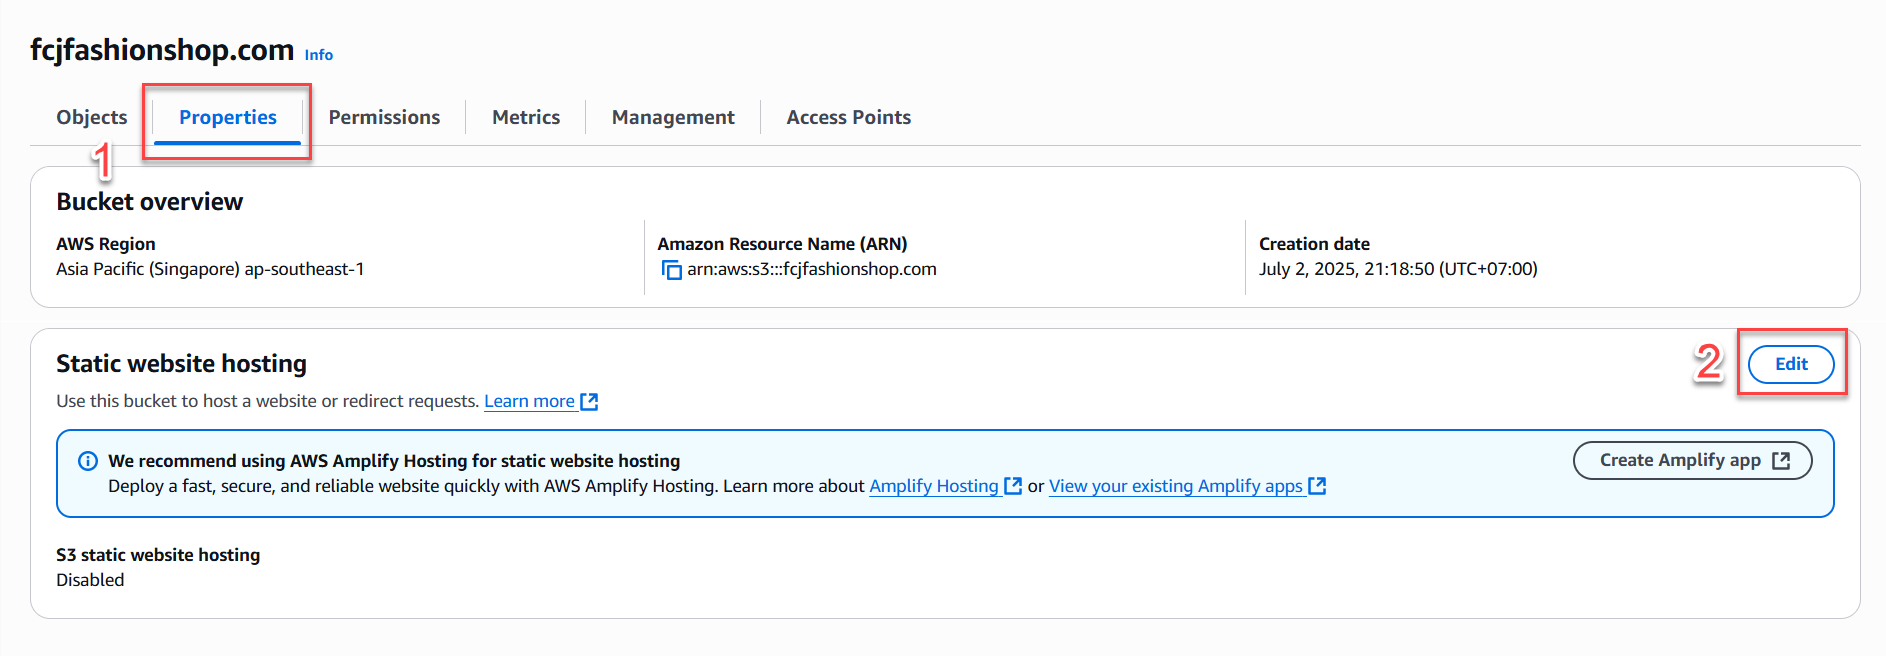
- Go to your frontend bucket in the AWS S3 Console.
- Select the Properties tab.
- Scroll down to Static website hosting and click Edit.
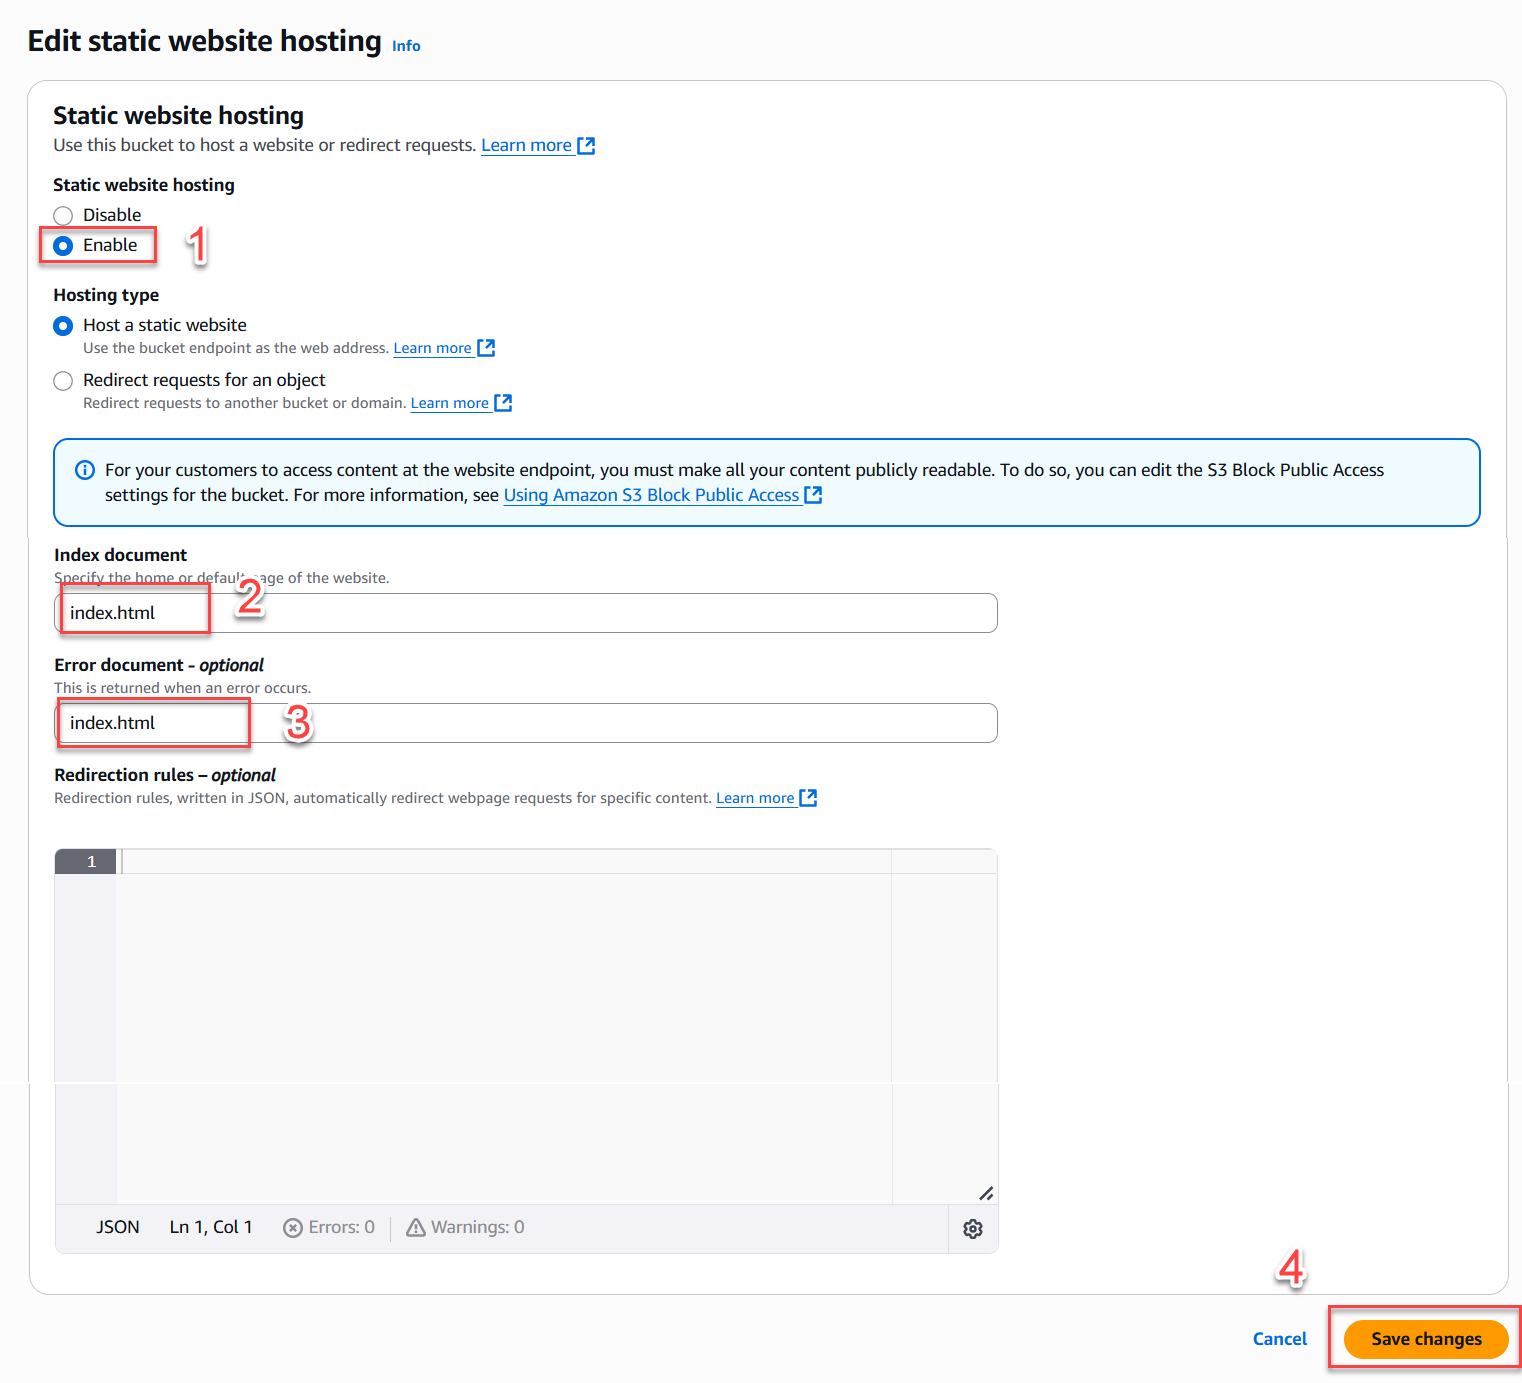
- Select Enable.
- Enter
index.htmlin the Index document field. - You may also enter
index.htmlfor the Error document field (recommended for SPA deployments). - Save the settings.
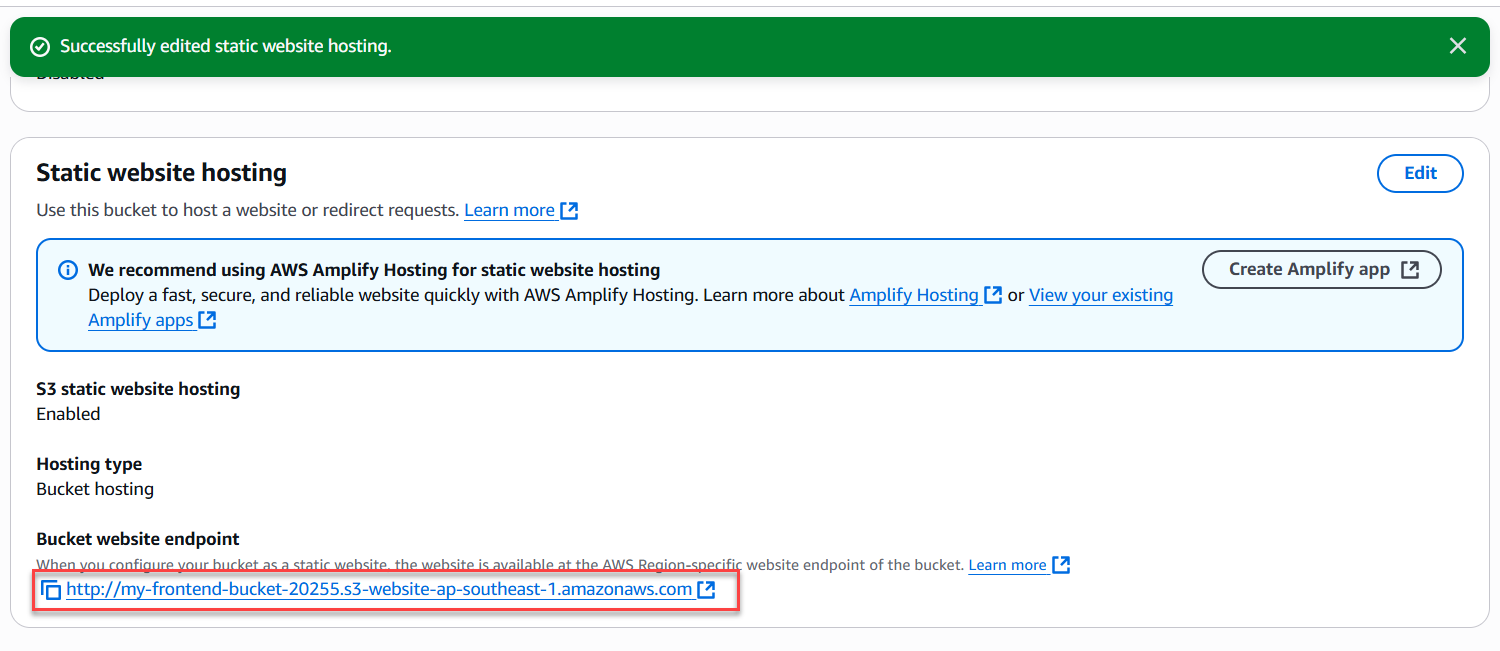
- AWS will generate a Website endpoint like:
http://fcjfashionshop.com.s3-website-ap-southeast-1.amazonaws.com - Copy this URL for the next step.
-
Configure CORS for the bucket
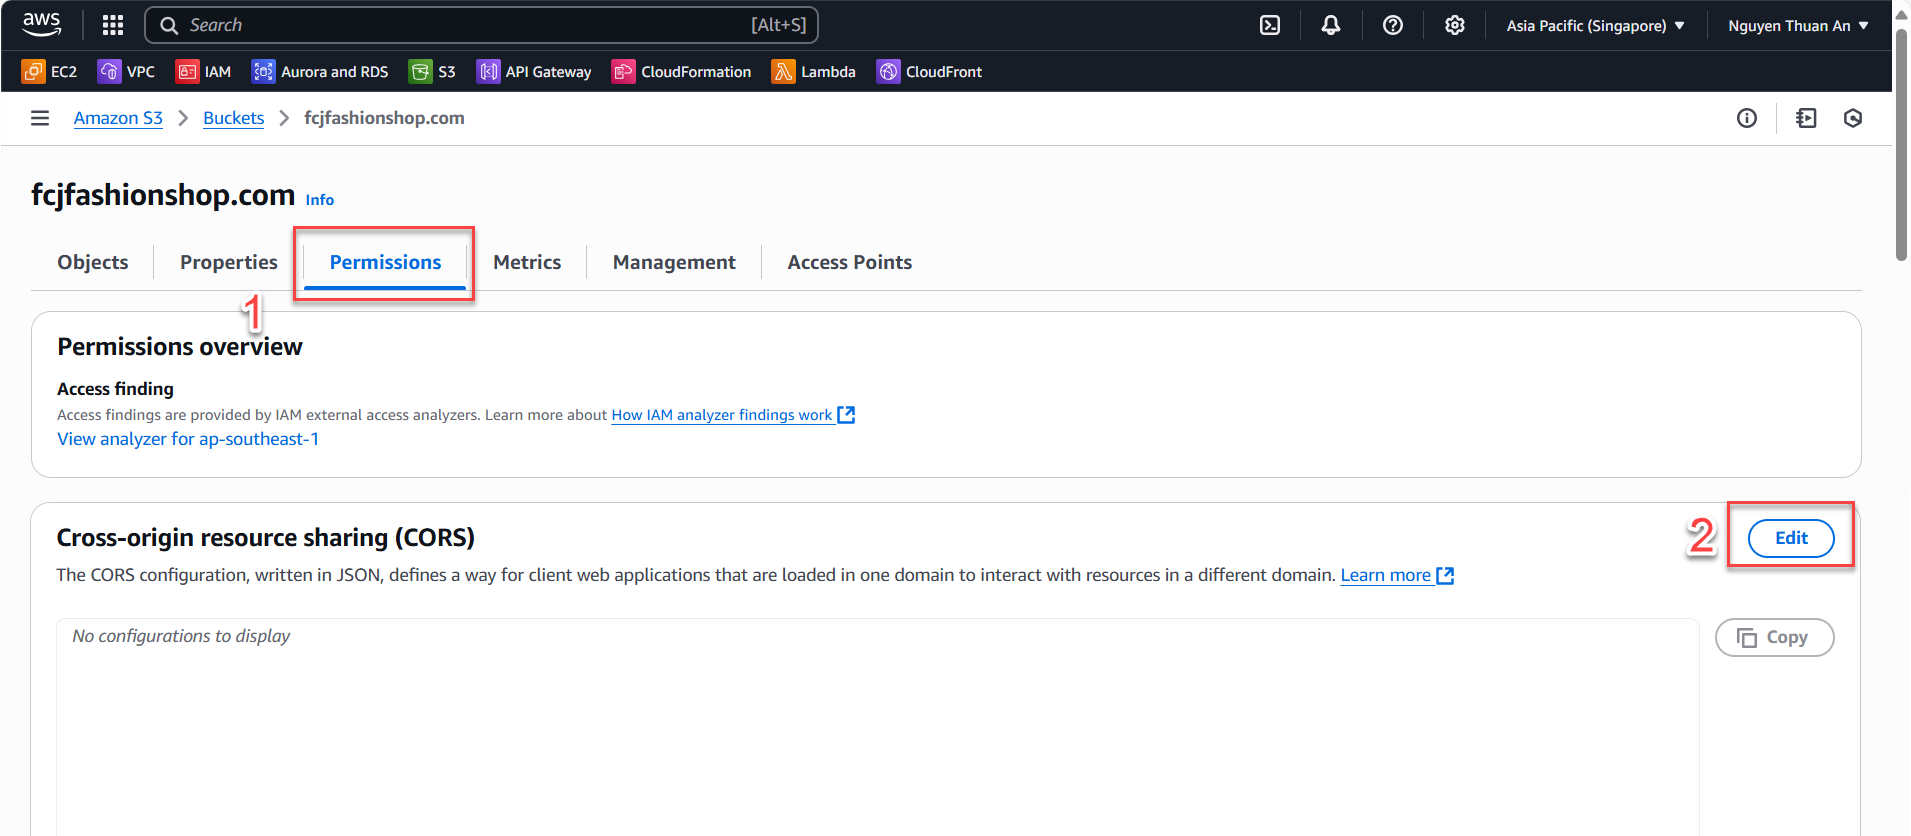
- Go to the Permissions tab → scroll down to CORS configuration → click Edit.
- Add the following sample configuration (JSON) to allow the frontend to access resources or upload images to S3 from other domains:
[ { "AllowedOrigins": ["*"], "AllowedMethods": ["GET", "HEAD", "PUT", "POST", "DELETE"], "AllowedHeaders": ["*"] } ] - To restrict to a specific domain for better security:
[ { "AllowedOrigins": ["https://your-domain.com"], "AllowedMethods": ["GET", "HEAD"], "AllowedHeaders": ["*"] } ] - Click Save to apply.
- Go to the Permissions tab → scroll down to CORS configuration → click Edit.
Step 2: Grant Public Permissions to the S3 Bucket
-
Set permissions for the Frontend Bucket
- Go to the Permissions tab of the bucket, scroll down to Bucket policy → Edit.
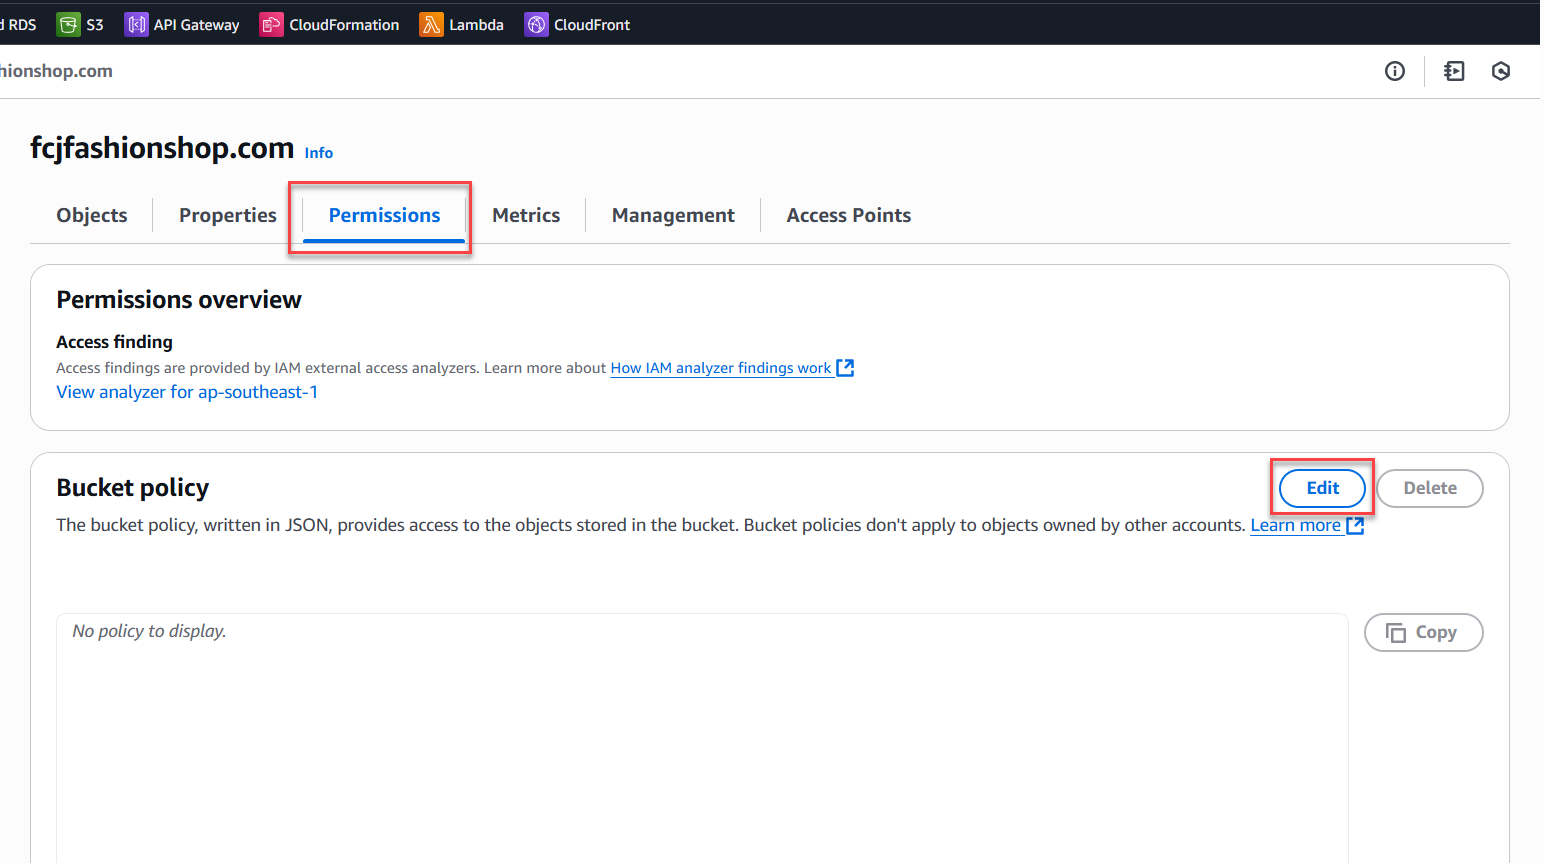
- Add a policy to allow public read access, for example:
{ "Version": "2012-10-17", "Statement": [ { "Sid": "PublicReadGetObject", "Effect": "Allow", "Principal": "*", "Action": "s3:GetObject", "Resource": "arn:aws:s3:::fcjfashionshop.com/*" } ] } - Click Save to apply.
- Go to the Permissions tab of the bucket, scroll down to Bucket policy → Edit.
-
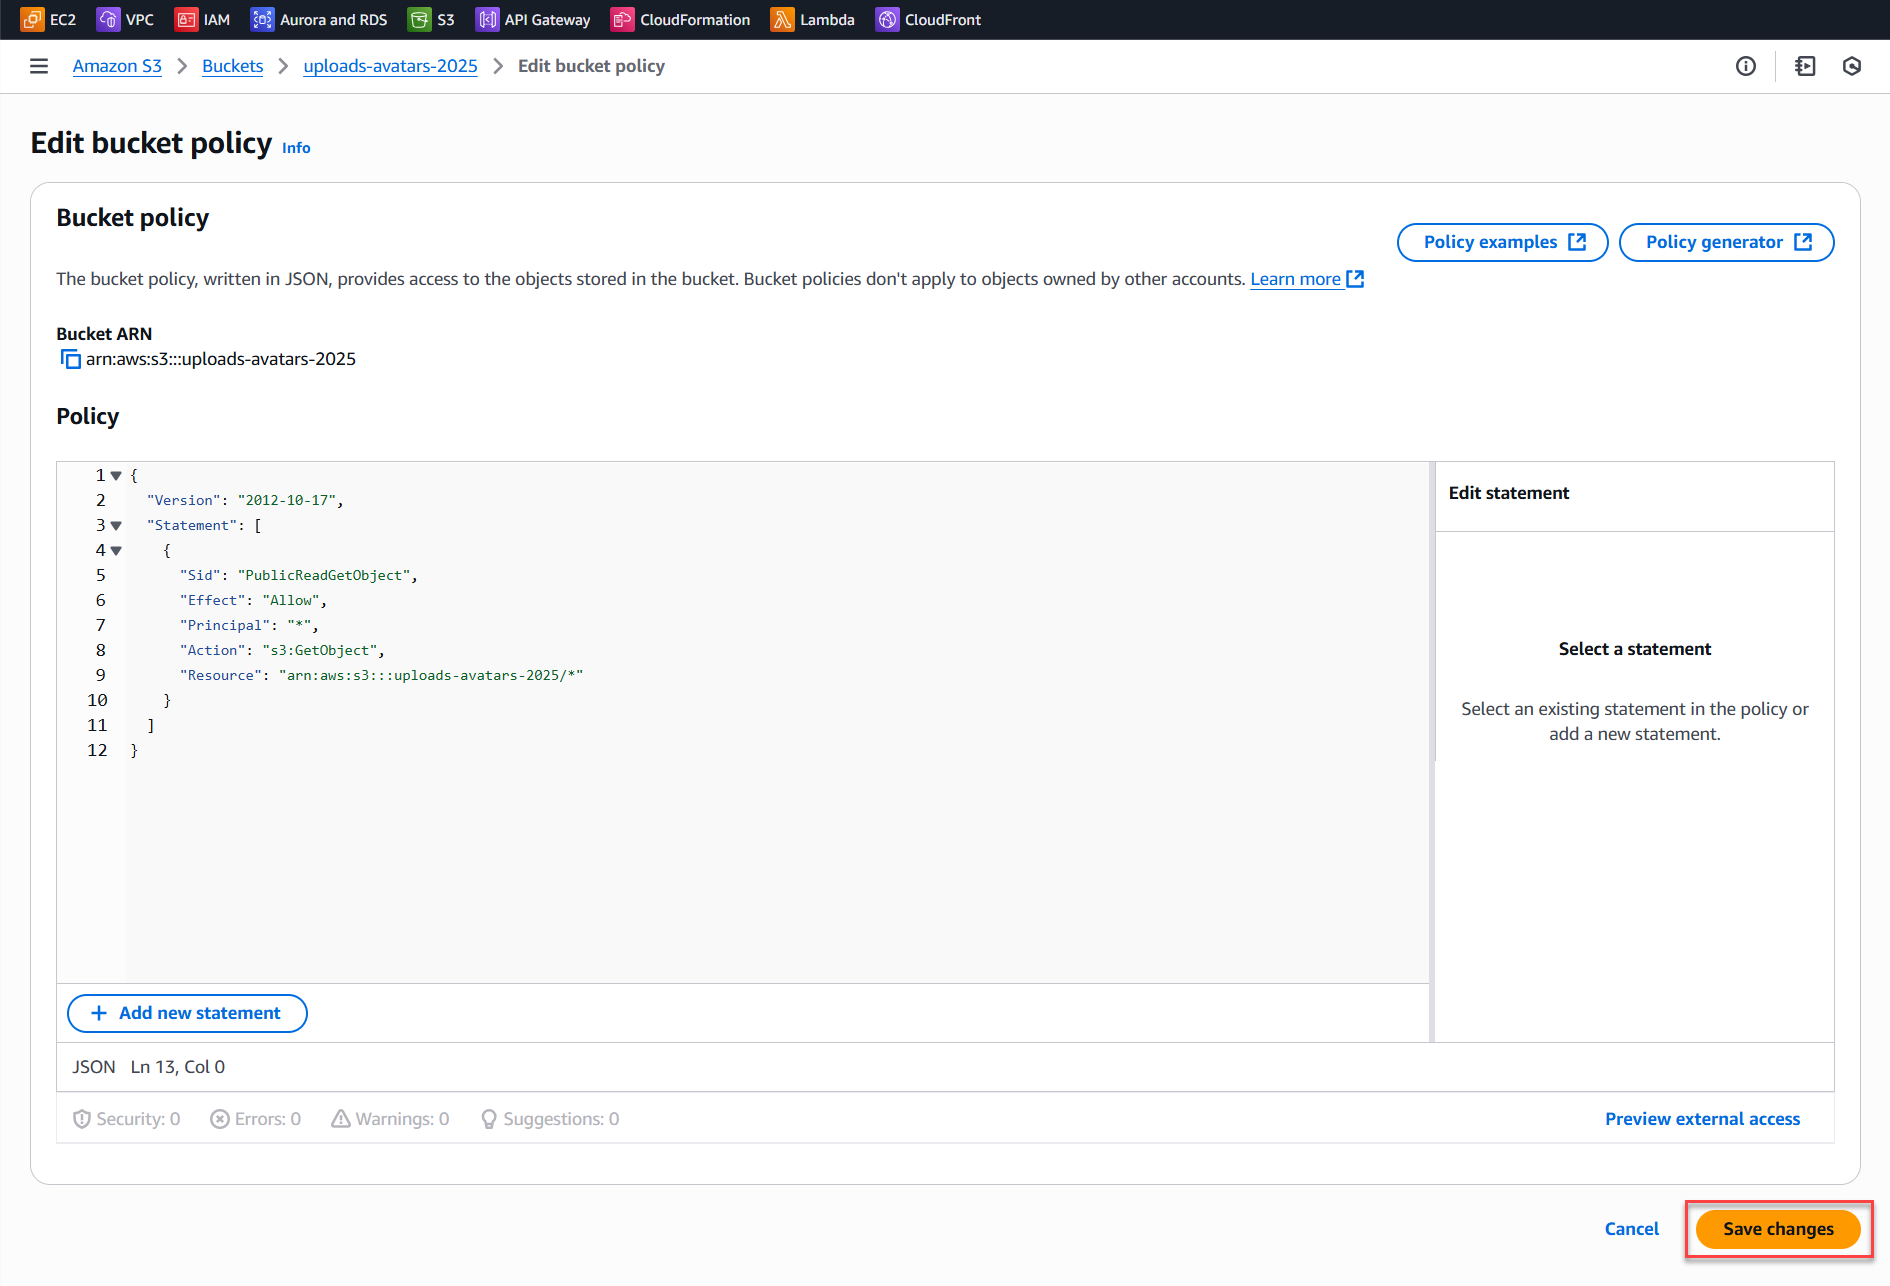
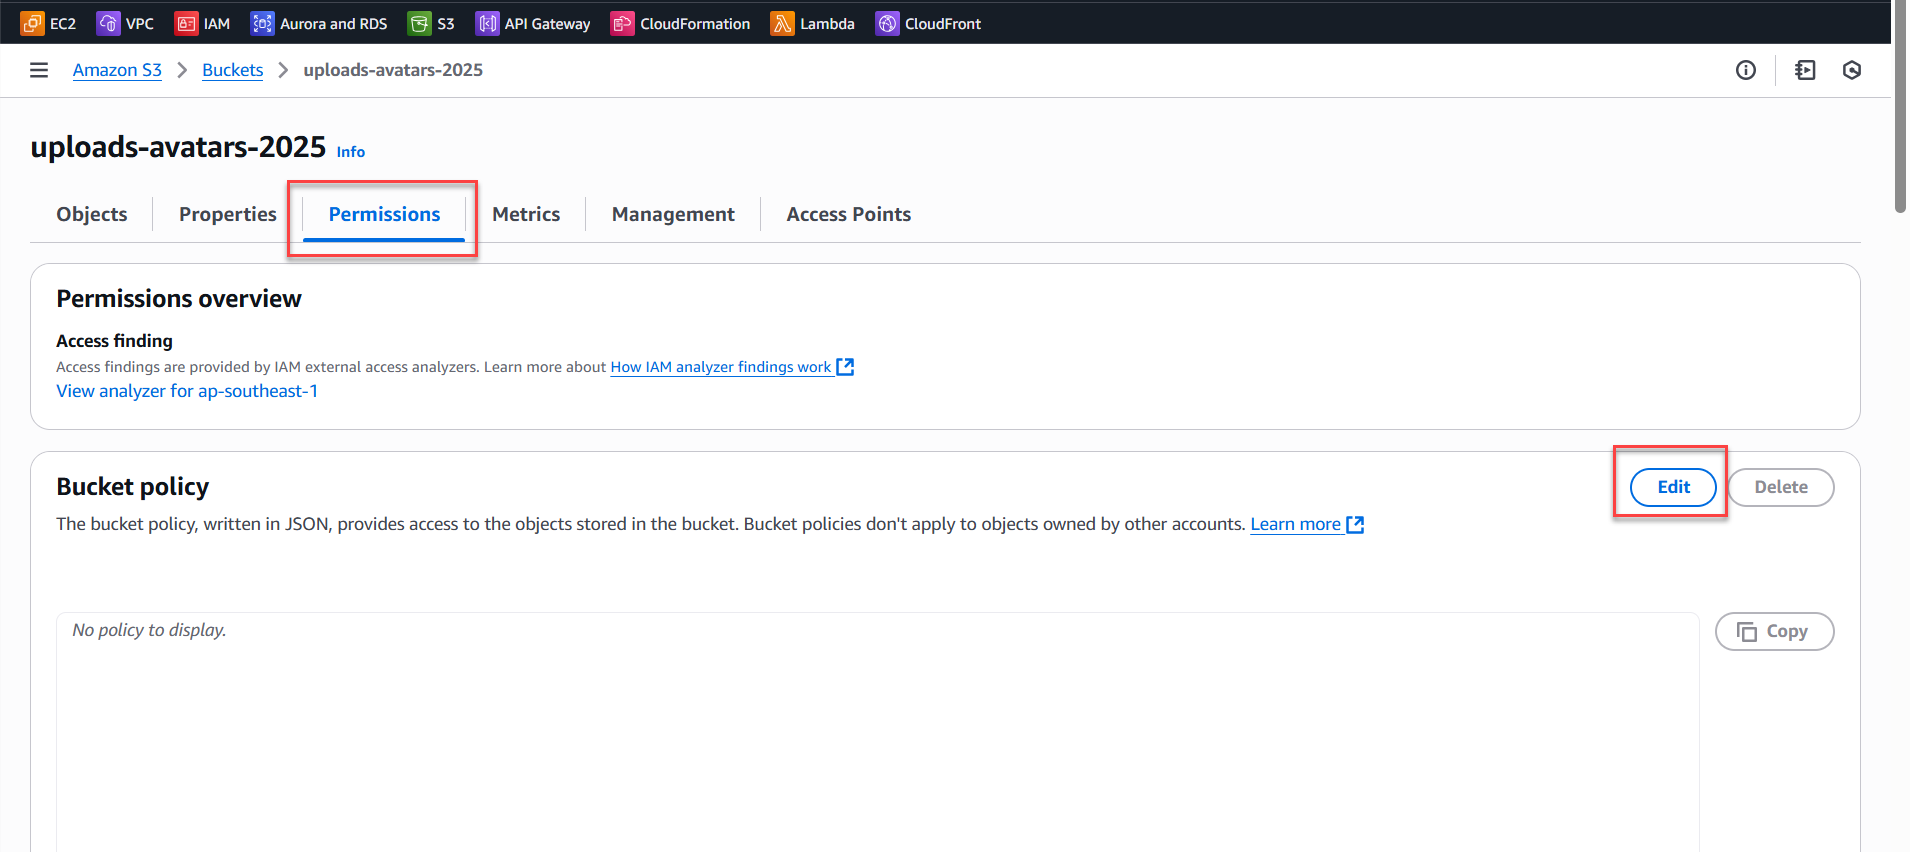
Set permissions for the avatar upload bucket (if any)
- Go to the Permissions tab of the bucket → Bucket policy.
- Add a policy to allow public read access, for example:
{ "Version": "2012-10-17", "Statement": [ { "Sid": "PublicReadGetObject", "Effect": "Allow", "Principal": "*", "Action": "s3:GetObject", "Resource": "arn:aws:s3:::uploads-avatars-2025/*" } ] } - Click Save to apply.
- Go to the Permissions tab of the bucket → Bucket policy.
Step 3: Verify Website Operation
- Use the Website endpoint link to test your website.
- If
index.htmlloads successfully, your website is running on S3.
- If you encounter 403/404 errors:
- Double-check your bucket policy permissions.
- Make sure static hosting is enabled.
- Verify that your index/error file names are correct.
Note:
You should only use "*" for development/testing. When deploying to production, always specify your real website domain in AllowedOrigins for better security.
Conclusion:
Properly enabling static hosting, configuring CORS, and setting public permissions will ensure your frontend website on S3 operates reliably, can call the backend API, and provides optimal load speed and user experience.