Grant Public Permissions to S3 Bucket
Grant Public Permissions to S3 Bucket
To access your website interface, you need to configure the permissions for the S3 Bucket that hosts your frontend.
Step 1: Grant Public Permissions to the S3 Bucket
-
Grant permissions for the Frontend Bucket
- Go to the Permissions tab of your bucket, scroll down to Bucket policy → Edit.
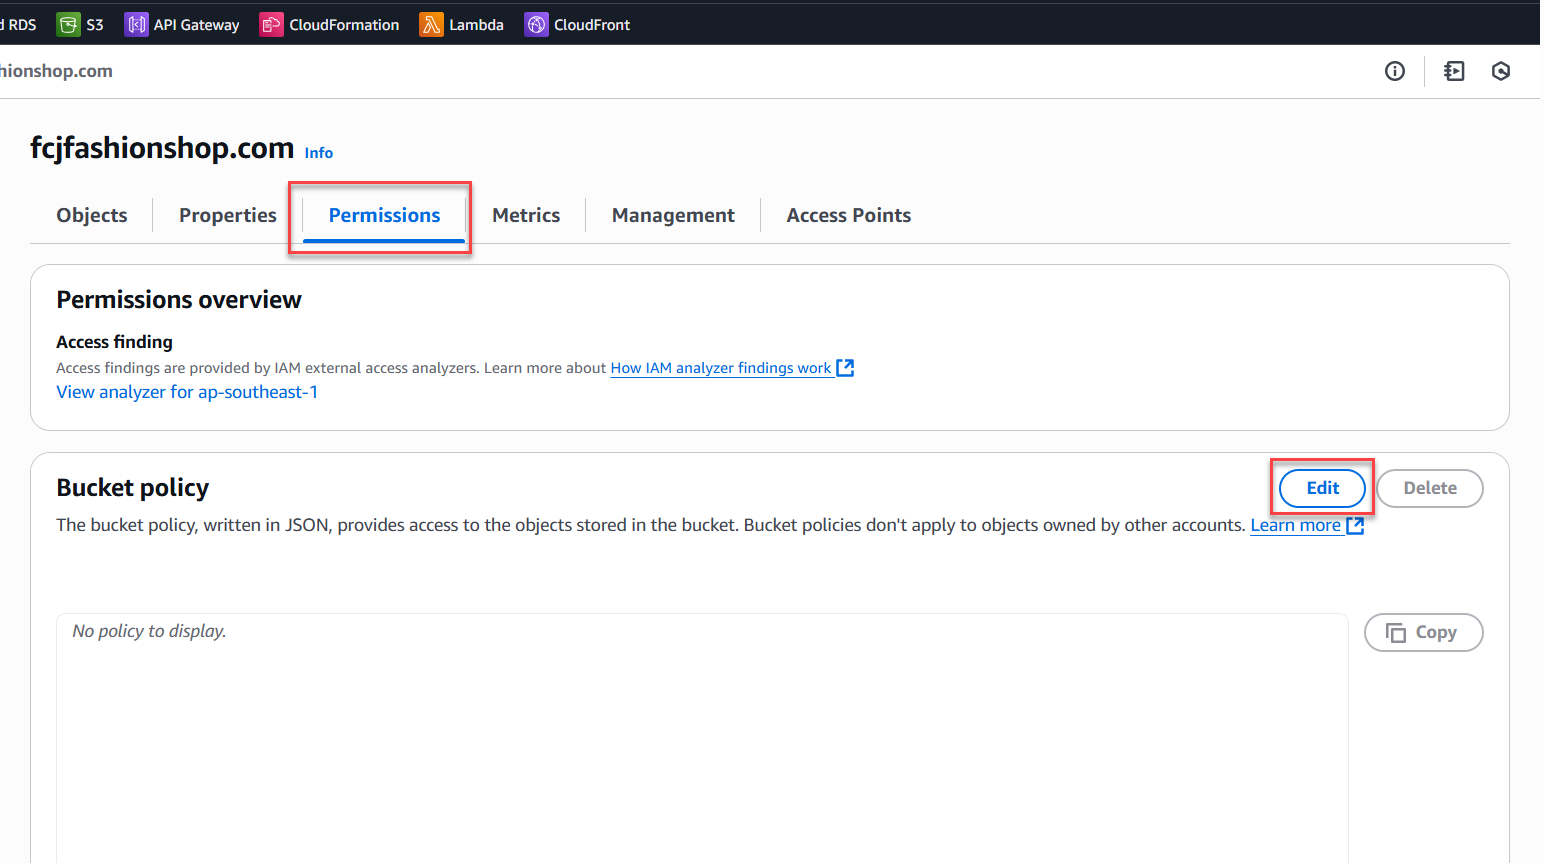
- Add a policy to allow public read access to files, for example:
{ "Version": "2012-10-17", "Statement": [ { "Sid": "PublicReadGetObject", "Effect": "Allow", "Principal": "*", "Action": "s3:GetObject", "Resource": "arn:aws:s3:::fcjfashionshop.com/*" } ] } - Click Save to apply.
- Go to the Permissions tab of your bucket, scroll down to Bucket policy → Edit.
-
Grant permissions for the avatar upload bucket (if any)
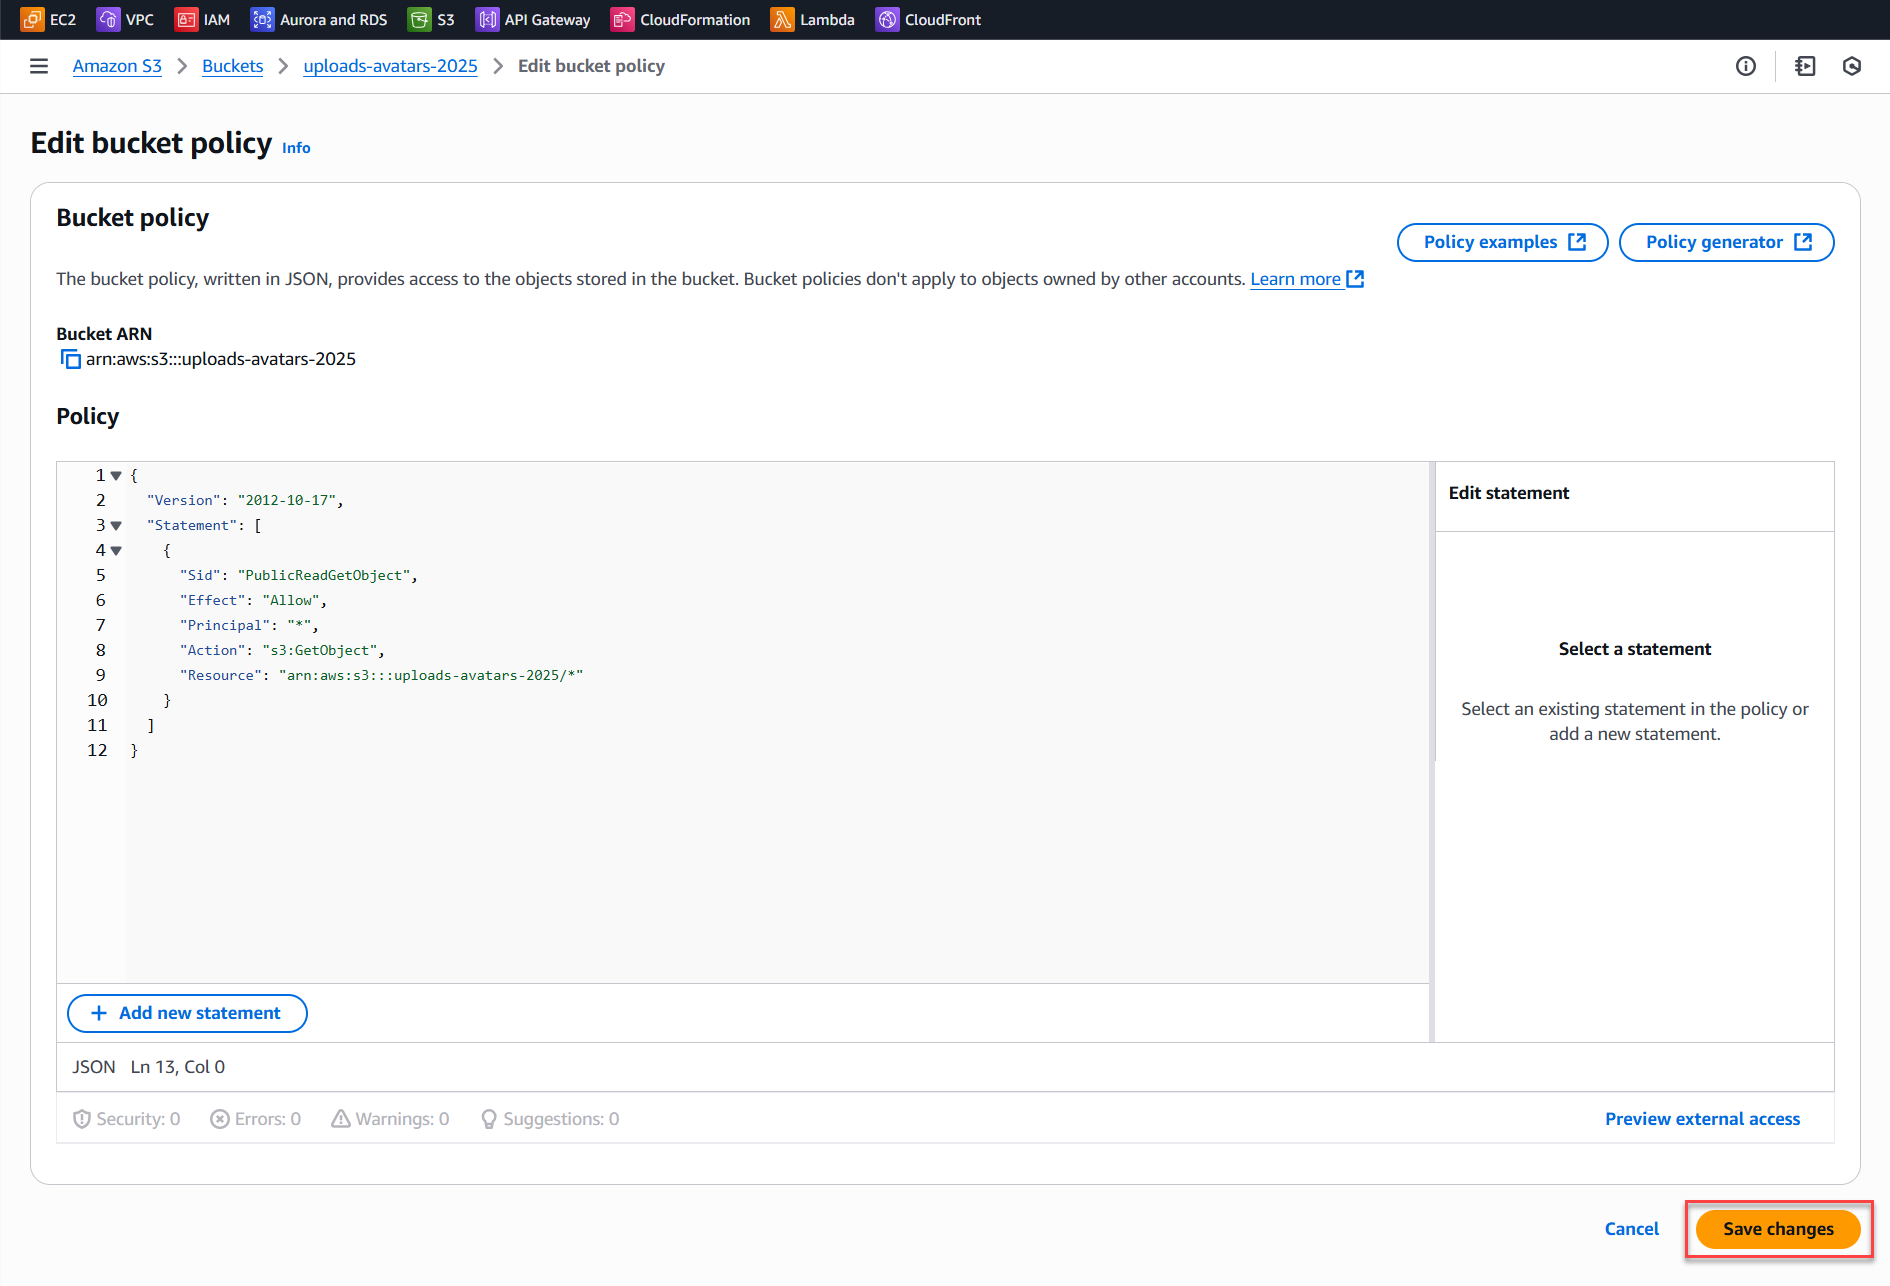
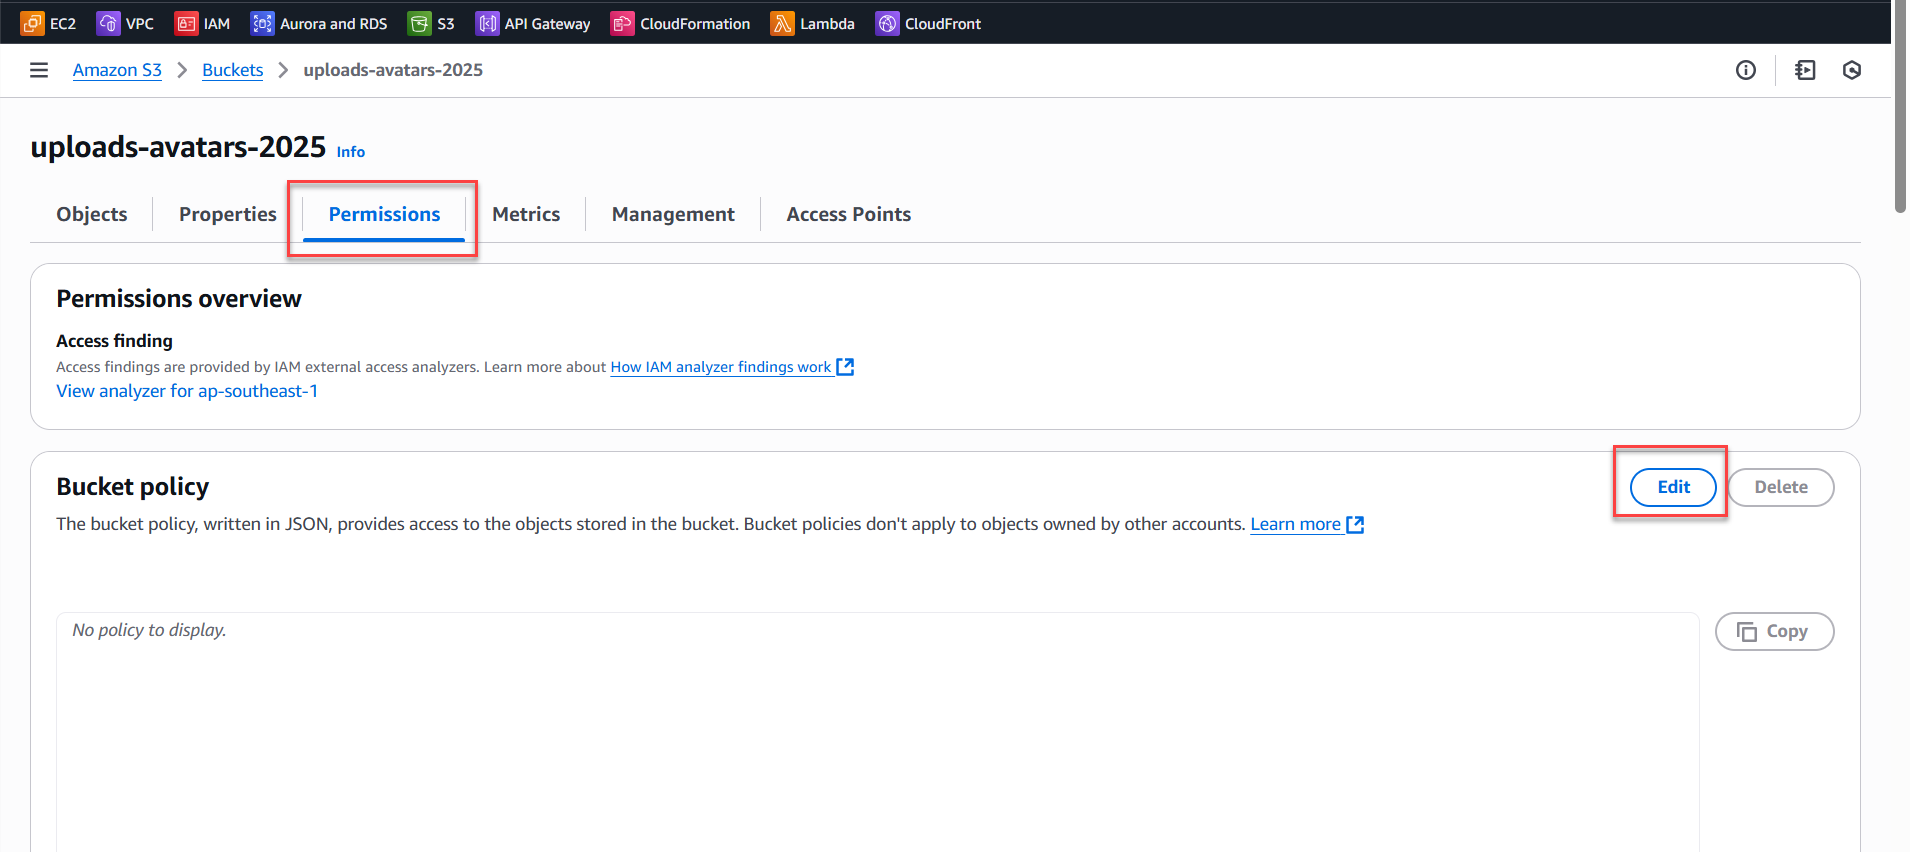
- Go to the Permissions tab of the bucket → Bucket policy.
- Add a policy to allow public read access to files, for example:
{ "Version": "2012-10-17", "Statement": [ { "Sid": "PublicReadGetObject", "Effect": "Allow", "Principal": "*", "Action": "s3:GetObject", "Resource": "arn:aws:s3:::uploads-avatars-2025/*" } ] } - Click Save to apply.
- Go to the Permissions tab of the bucket → Bucket policy.
Step 2: Verify Website Operation
- Use the Website endpoint link to test your website.
- If
index.htmlloads successfully, your website is running on S3.
- If you encounter 403/404 errors:
- Double-check your bucket policy permissions.
- Make sure static hosting is enabled.
- Verify that your index/error file names are correct.
Note:
Only use "*" for development/testing. When deploying to production, always specify your actual website domain in AllowedOrigins for enhanced security.